My Burrito Recipe

I used to have friends, that whenever they found out I was making burritos, would be sure to invite themselves to dinner.  Or they would suggest they come for dinner and then request burritos.

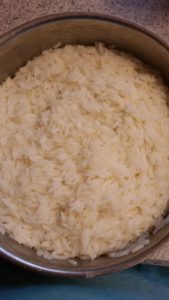
I start by making some Lime Rice.  I bring 3 cups of water to a boil and add 1-1/2 cups of rice.  Bring to a boil, reduce, cover and cook till about 1/2 inch of water left in bottom of pan.  Zest 1 lime and add with all of the juice of that lime.  You can throw the lime rind in to finish the cooking. Pull it out when finished.  (Pix 1)

Burrito Meat Mixture:  Cook 1/ 2 of a medium onion in 1 Tablespoon of oil.  Add 1 pound of ground meat and brown.  I use mostly venison, but ground beef is fine.  When it is cooked through, add 1 can of refried beans and 1 packet of taco/burrito seasoning with 1/2 a cup of water.  Cook another few minutes, stirring, till well mixed.  Turn oven on to 350 degrees.

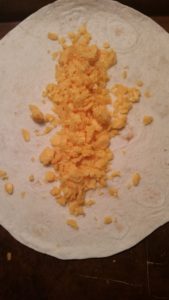
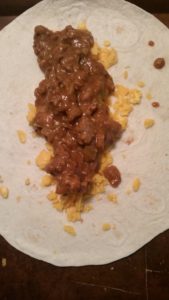
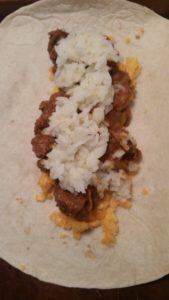
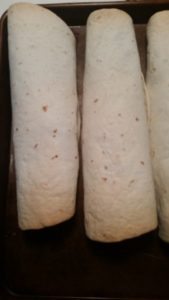
To assemble:  Lay a tortilla on a cookie sheet and lay some cheese down the middle.  Use cheddar, Monterey jack, a jalapeno cheese or whatever kind you like (Pix 2).  Cover the cheese with some of the meat mixture (Pix 3).  Add the lime rice on top of the meat (Pix 4).  Roll up.  I leave the ends open.  Bake for about 20 to 25 minutes till ends turn brown.

Here’s the fun part!  You can add whatever you like.  Here are some suggestions:

Sour cream, chopped tomatoes, chopped fresh onion, salsa, jalapenos (or any hot peppers you like), lettuce, chipotles chopped, fire roasted chilies, etc.


Homemade Pizza

If you’ve read my previous blog on baking bread, you might be surprised that I make really good pizza.  My parents owned a couple of pizza shops and I worked at them both and became good at making pizza, my very favorite food of all.

I made pizza for my 50th birthday party with all of my family and my cousins wife, Amy, sent me a message on Facebook afterwards and said that I had inspired her to try and make her own.  Her words were that she had tried a recipe she found online and “NOTHING compared to the fluffy cloud of goodness of the delectable yumminess” of my pizzas.  Bless her heart…

I don’t have a recipe for the dough, but I can describe how I do it.  I use a kitchenaid mixer with a dough hook.  I put cool tap water in the bottom about an inch and a half deep.  Then I add about a half an inch of milk.  I put in a tablespoon of sugar and sprinkle yeast all of the top of the liquid.  I turn the mixer on for a few seconds to mix and turn off and let it sit until the yeast bubbles, usually a few minutes.  Then I put in a teaspoon of salt and some whole wheat flour, maybe a cup or little more.  Then I start adding unbleached flour, while the hook is stirring.  I let it go awhile and if it is too runny, I add some more flour.  When it just pulls all together, I mix it on the 2nd lowest number for about 3 minutes until there is no dough left on the sides of the bowl and it is all together.

I put in an oiled bowl in a warm spot.  Sometimes I sit on the oven and turn it on low.  You can also put it in the refrigerator and it raises overnight.  You can use it the next afternoon for dinner.  You can freeze it before you let it raise and just get out as needed.

When it looks like it has doubled in size, I poke a finger in to the first knuckle and if it doesn’t bounce back up, it is ready to use.  I spray oil onto a cookie sheet.  Sometimes I put a little cornmeal on it.  Then spread the dough to all the corners.  You can either let it raise some more, like another 20 minutes or you can just sauce it and lay on your toppings and bake.

I use Dei Fratelli Pizza Sauce.  I have made homemade, but don’t really notice much of a difference.  Then just the toppings I like and top with a mix of mozzarella and provolone.

Bake at 400 degrees until cheese is browned.  About 20 to 25 minutes.

It’s fun to try different toppings and even dessert ones.  You can put butter on the crust and add Nutella and marshmallows; cinnamon and sugar; apples and caramel etc.  The kids love to get creative and come up with new ones.


Brownies and School Lunches

Along with the learning to cook story, from that first cookbook, “The New Betty Crocker Cookbook”, I tried some baking also.  I was a stay at home mom for the first years of my children’s lives, so the one income had to cover everything.  So, I wanted to try the brownie recipe and real chocolate was pricey.  I had seen on my cocoa can that you could substitute with some oil for melted chocolate.  I tried it and really liked it and I have done it that way ever since.  I also doubled the recipe to fit a regular sized cake pan because when my children were in school, I would make a big pan, cut into 15 pieces and freeze in sandwich bags, so I could just pop them into the lunch bags in the morning and they were defrosted by lunch.

I tried to make some of the snacks they carried for their lunches.  That way, I could use unbleached flour, a little whole wheat flour, cut the sugar a little or substitute honey, and make them without preservatives, colors and additives.

I am now baking for my grandchildren’s lunches.  I make cookies, cupcakes, breads and muffins also, along with Ree Drummonds Strawberry Granola Bars.  The children LOVE these!  I substitute any fruit that I have in the freezer.  Sometimes, I use up a lot of close-to-empty jam jars and just polka dot the flavors all over.  Then cut them as usual and the bars have different flavors in each bar.  I call them mystery bars.

Here is my adjusted version of the brownies I mentioned above:

c=cup, t=teaspoon

1 c. cocoa powder

1/4 c. oil (I use olive)

2/3 c. shortening

2 c. sugar

4 eggs

1 t. vanilla

1-1/2 c. flour

1 t. baking powder

1 t. salt

(You can add 1 c. of chocolate or white chocolate chips and/or 1 c. of toasted walnuts at the very end of mixing, to change it up a bit.)

Melt shortening in microwave for 20 seconds, stir and do another 20 if needed.  Add cocoa powder, oil, and sugar.  Stir well.  Add eggs and vanilla, stirring well.  Then mix in flour, baking powder and salt till just incorporated and you don’t see any more flour.  Spray grease your 13 x 9 cake pan.  Bake at 350 degrees for 20 – 25 minutes or until a toothpick comes out clean.  Let set till cool before cutting.

I do not put icing on these when they are for the freezer, because icing doesn’t do well with the plastic bags after they thaw.  But I frequently do for home.  I just use a simple recipe of 1# confectionary sugar mixed with 1/2 c. shortening or butter and 1 t. of vanilla and just enough milk to bring it all together.  You can add some food coloring if you like.

Rhubarb

I have two very good recipes that use rhubarb for those of you who like it.  People that don’t even like it, like these.

Rhubarb Cake       Preheat oven to 350 degrees F.  Grease and flour a 9 x 13 inch baking dish.

For the Batter:  Stir together 2 cups flour, 1-1/4 cups sugar, 1 teaspoon baking soda and 1/2 teaspoon of salt in a large bowl.  Add 2 eggs, beaten and 1 cup of sour cream and stir till smooth, then fold in 5 cups of diced rhubarb.

(This batter is very thick and barely covers the rhubarb.  I thought it was ruined but comes out wonderful and light!)  Pour into prepared dish and spread evenly.

For the Topping:  Stir together 1 cup sugar, 1/4 cup butter, softened, in a small bowl until smooth.  Add 1/4 cup flour and stir until mixture is crumbly.  Sprinkle on top of the batter.  You can dust lightly with cinnamon if you’d like.  I like it with and without it.

Bake until a toothpick inserted in the center comes out clean, about 45 min.  Cool cake in pan on rack for 1 hour. (I usually can’t wait that long, I like to eat it warm, sometimes with a little ice cream 🙂

Recipe #2  Rhubarb Cheesecake Smoothie

In a large saucepan, bring 2 cups of diced fresh or frozen rhubarb, 1/4 cup of water and 2 Tablespoons of sugar (or honey) to a boil.  Reduce heat; cover and simmer 5 to 10 minutes, or till rhubarb is tender.  Cool to room temperature.

In a blender, combine 1-1/2 cups of vanilla ice cream, 1 cup milk, 1 cup strawberries (frozen is good), 6 ounces cream cheese chunked, 1/2 cup plain yogurt, 1 teaspoon of good vanilla extract, 1/4 cup of confectioners’ sugar, 3 Tablespoons of sugar and 6 to 8 ice cubes depending on size of them.  Cover and blend till desired consistency.  Serve.

You can change out the fruit in this to all blueberries, raspberries, banana, peach, etc.  Just don’t cook them and don’t add any water.

*My husband likes both of these recipes and HATES rhubarb.  Just saying…


Rhubarb Jelly

If you like and make rhubarb jelly, I have found that if you wash and freeze the rhubarb in 1″ chunks.  You can later thaw it and the juice from it is a beautiful pink and that is all you need to use to make your jelly.  Just measure out the amount your recipe calls for.  You don’t have to go to the trouble of cooking the rhubarb and straining the juice out.  I just thaw, squeeze the rhubarb in the plastic bag to get any more out and you are ready to make jelly.  Not near the mess and tastes delicious!  You could use the rhubarb pieces to make the cake above.  Two gifts in one!  Oh yes, and when you thaw a plastic bag, whether it be Ziploc or a no name brand, please put it in a large bowl as I have found that sometimes the juice seeps out of the bag while thawing.  What a mess that can be!